Showing posts with label Adventures in Cooking. Show all posts

Thursday, May 9, 2013

Adventures in Cupcake Decorating - Baby Shower Cupcakes

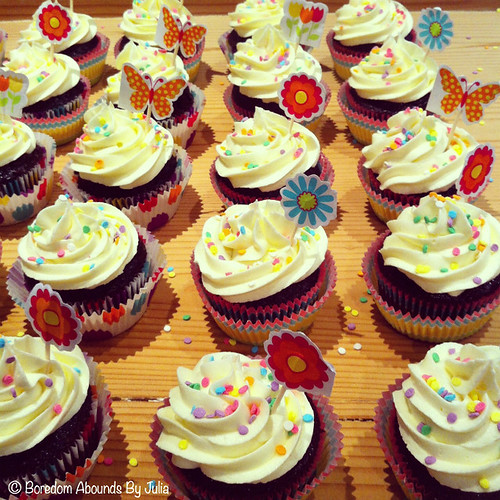
I made some cupcakes for a baby shower in February using fondant to decorate them, but I wanted to try some with buttercream. One of my best friends had her baby shower last weekend, so it was a perfect opportunity to practice using buttercream. I've been watching a lot of a show called Cupcake Wars, and they all use buttercream, marscapone, cream cheese, and meringue icings with piping bags, and it didn't look too difficult.


I don't have a lot of experience with piping bags - the few times I've used them the icing hasn't been very good, but this time I allowed myself a lot of time to really get the buttercream to the right texture. The secret, I think, is to let it whip for a really long time until it's very light and fluffy. 


I let the buttercream whip for about twenty minutes, and piped the swirls on really carefully, then sprinkled edible rainbow confetti on to it. I'm quite pleased with the results! The only downside was the patty pans - they were gorgeous rainbow patterns, but they were too thin, so because the cake was chocolate mud, when it cooked, the colour of the cupcake penetrated through the patty pans (which you can see in the top photo) and the colours were totally lost. Luckily the pack had heaps of extra patty pans, so I double layered them and all was fine.

I'm still working on how to get the cupcakes to cook in that perfectly round cupcake shape. I find that mine always go slightly too high in the middle, or a bit lopsided, rising more on one side, but overall I am super happy with how these turned out!


Pin It

Tuesday, April 23, 2013

Adventures in Cooking - First Birthday Cake

As I mentioned on Monday, it was our daughter's first birthday last week. First of all, I cannot BELIEVE how fast that year went. Second of all, she is still completely adorable. 

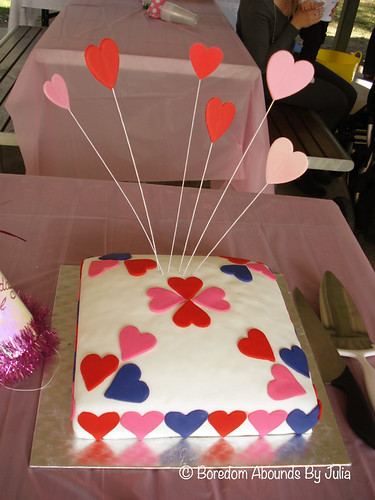
We had a party for her at the park with friends and family, and since starting my cupcake decorating endeavours a few months ago, obviously I wanted to make her birthday cake. I was going to do cupcakes, but the logistics of transporting them to a park was a bit crazy, since I would have had to bake 60 or so so that everyone had one. Instead, I decided to do a square slab cake. The results were pretty good!


It was a simple eleven inch chocolate mud cake, decorated with white and coloured fondant, and it was much easier than I thought! I hired the cake tin for $7, and the cake took about three hours to bake in my oven, but the decorating only took about an hour and a half. The most time consuming part was kneading and rolling out the white fondant, which had to be one big sheet big enough to cover the entire cake, and I trimmed off the excess. I would have preferred the cake to be a little bit more moist - it was moist, but I think it could have been even more moist, so next time I'll experiment a bit more. I used a commercial cake mix so that the cake would keep longer, and it was delicious! That size cake served about 60 people with some left over, which was perfect.

I'm looking forward to creating something different and trying new designs when I hopefully make another few cakes for some functions in a couple of months. Pin It

Wednesday, March 27, 2013

Adventures in Cooking - Mini Jam Tarts

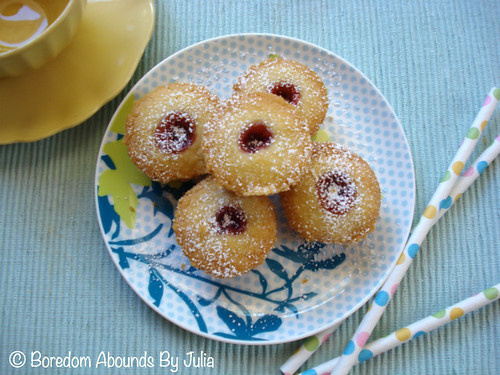
This is a recipe I got from my lovely cousin. She makes these for family get togethers, and they are little bites of crumbly goodness. I love a dessert that is small and easy to eat, but completely delicious and full of flavour, and these mini jam tarts tick all those boxes. 

Something else that's great for us is that they are egg free. We recently found out our (almost ONE YEAR OLD WHAT) daughter is allergic to eggs, so I am now always on the hunt for delicious recipes that are egg free to make for her once she can eat things other than mush.


Ingredients
250g butter, softened to room temperature
1 teaspoon vanilla extract
1 cup icing sugar, sifted
2 cups plain flour, sifted
1 - 2 teaspoons of cold water
1 cup jam (approximate) - any flavour you like
icing sugar to dust

Preparation and cooking time: about 30 minutes.

Method
- Preheat your oven to 180ºC (about 160º for a fan forced oven)

- Grease a mini muffin pan with some butter

- Chuck the butter, vanilla, icing sugar, and flour into a mixer. Beat until it's combined, and starts to resemble a semi-crumbly, dough like consistency. You may need to add the teaspoons of cold water now if the dough isn't sticking together.

- Roll teaspoons of mixture into balls and place into the muffin pan. I made mine about the size of a golf ball.

- Make a hole indent into the centre of each ball with your finger. You can make the hole as big or small as you like. I personally like to make it a bit larger, because then you can fit more jam in, which mixes well with the shortbread-like taste. But make sure you don't pierce through the bottom, otherwise the jam will fall out, and we really can't have that.

- Spoon jam into each hole, making sure it's level with the top of the ball.

- Bake for about 15 minutes, or until golden.

- Cool tarts in the pans.

- Dust with icing sugar before serving.

Delicious!

Got any good egg free recipes or websites? Let me know in the comments! Pin It

Thursday, February 14, 2013

Matters of the (Chocolate) Heart

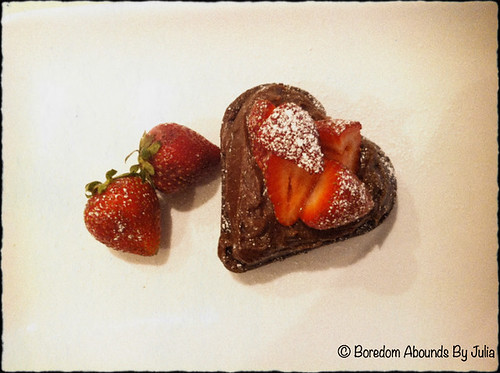
A super quick post this evening. Yes, it's Valentine's Day, and while it's not a huge deal for my husband and I, I still wanted to make something nice for him. So, I found this recipe on Taste and gave it a whirl. 


The verdict? Delicious. Yes, the one pictured has chocolate ganache and strawberries on it, and I served it with pistachio gelato, but I had enough mixture left over to make a loaf cake. Without chocolate ganache, it's still a pretty tasty cake! I would maybe add a tiny bit of vegetable oil to the recipe because I suspect it could get a bit dry, but it's quite nice. Not too dense, not too rich. I highly recommend it.
  Pin It

Wednesday, January 23, 2013

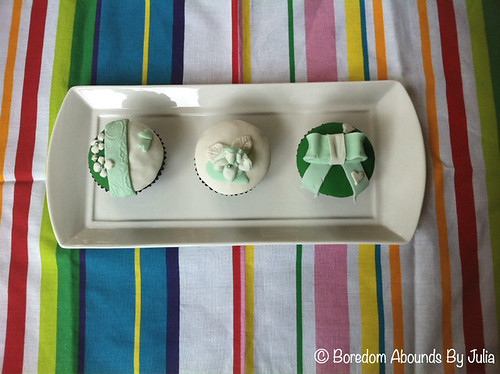
Adventures in Cooking - Cupcake Decorating

Last week I did a cupcake decorating class. It was a Living Social special and as soon as I saw it I snapped it up because it was for the cake place I got my wedding cake from. And where I got my thirtieth birthday cupcakes from. And where I got my mum's sixtieth birthday cake from. And where two of my friends get their cakes from. In short, they do THE most delicious cakes there. The decorating is gorgeous, the cakes are moist and delicious, no matter which flavour you choose, and as someone who doesn't love a lot of cake, I could eat an entire wedding cake from them without batting an eyelid.

So. Even though this was my first time doing proper cake decorating and they don't look very professional, it was super fun!


I did decorate six cupcakes, but my husband and I ate three of them. They were chocolate mud, in case you were wondering (you were. Admit it).


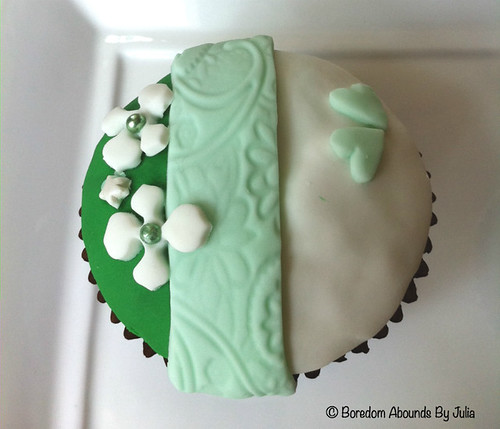
Working with the icing was so much easier than I thought. And to do all these little things, you just need a variety of stencils and cutters.


This ribbon rose was a bit harder to create, and it's sitting on a love heart that I didn't position properly so you can't see it, but it was still fun to create.


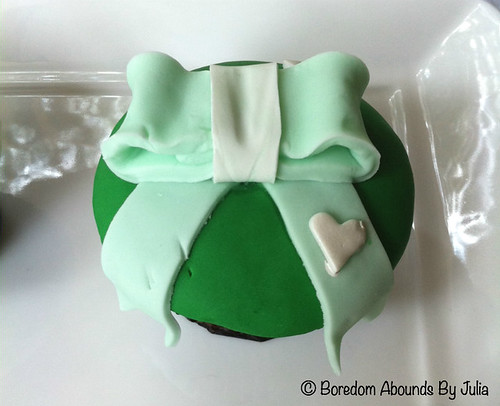
This bow was my favourite one to create. It was so unbelievably simple, but it looks so adorable. Done in pink or blue, or another pastel colour, I think it would be perfect for baby showers, kitchen teas, and birthday parties. I really want to recreate these first I think.

In summary, cupcake decorating is fun and now I want to decorate ALL THE THINGS. Pin It

Thursday, September 6, 2012

Adventures in Cooking - Raspberry Lemon Cake

Once again, it's been ages since I did one of these! When you have a four month old baby who only sleeps for 30 minutes at a time, it's kind of hard to do the full photo posts I used to do when I baked. Actually, it's kind of hard to even bake, full stop. Hopefully one day I'll be able to do the old style posts again, but for now it's just a recipe and the finished product!

Originally I saw this recipe on Pinterest (such a good time waster during 4am feeds!) and thought it seemed easy enough to make while the bub sleeps. It was! And it was totally delicious.


Ingredients
1 1/2 cups of plain flour
1 tablespoon of plain flour
2 teaspoons baking powder
1/4 teaspoon salt
1 cup buttermilk
1 1/4 cups sugar
3 eggs
2 teaspoons grated lemon zest
1/2 teaspoon vanilla essence
1/2 cup vegetable oil
1 cup raspberries (fresh or frozen)

Method
1. Preheat the oven. I have a fan forced oven that gets quite hot very quickly, so I had mine on about 150 degrees, then turned it down to about 120 degrees after about fifteen minutes of cooking.

2. Sift together flour, baking powder, and salt.

3. In a separate bowl, whisk together buttermilk, sugar, eggs, lemon zest, vanilla essence and oil. (Sidenote: why does buttermilk smell sour? I always think it's gone off when I use it, then I remember that it's meant to smell like that. WEIRD)

4. Mix the dry ingredients with the wet ingredients.

5. Mix the raspberries together with the tablespoon of plain flour. Gently fold into the mixture. I have no idea why you mix the raspberries with flour. Seems kind of pointless, and to be honest, next time I won't bother. I'll just chuck the raspberries into the mix.

6. Pour into loaf tin and bake for about fifty minutes, or until a toothpick comes out of the cake clean.

That's it! Really, really simple, and the cake is lovely and moist without being too dense. The lemon is subtle and zesty, and the raspberries add a nice tartness to the cake.

Notes
- If you have a look at the original recipe, you'll see they also have a lemon syrup and a raspberry topping. I didn't add either of these because I think the cake seemed sweet and tart enough, and looking at the ingredients for both those things I think the cake would be way too sweet to enjoy. Also, no one really needs a cake with that much additional sugar (and I say that as someone who loves sugary things). If anything, you could add a splash of lemon juice to the mixture before baking it, which is what I did. I probably added about a table spoon of lemon juice to the mixture and it's zesty without being sour.

- I used frozen raspberries (fresh ones were TWELVE DOLLARS a punnet at my supermarket this week. Um, no), but I think fresh ones would be slightly nicer.

- When you mix the berries in, make sure they go throughout the cake batter. I didn't mix them in enough because I didn't want them to break apart and the majority of them ended up at either end of the cake, which was kind of annoying. It made the middle of the cake seem a bit nude. NUDE, I TELL YOU. Pin It

Thursday, April 12, 2012

Adventures in Cooking - Choc Hazelnut Macarons

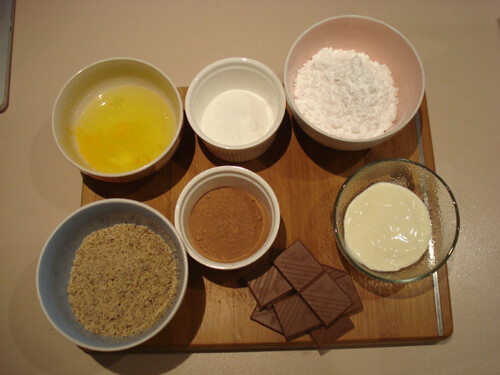
So, ever since I first attempted these strawberry macarons I've wanted to have another go because they worked so well. But I wanted something with a little bit more flavour, so I found this recipe on Taste and used it as a base. There were a few issues with it, but those were mostly because of my own STUPID UNPREPAREDNESS.

Anyway, let's get started, shall we?

Ingredients
1 1/4 cups hazelnut meal
1 1/2 cups pure icing sugar
4 egg whites at room temperature
1/4 cup caster sugar
2 tablespoons cocoa

Filling
100grams good quality chocolate (dark or milk)
2 tablespoons thickened cream
2 teaspoons of peppermint essence
Pin It

Tuesday, March 27, 2012

Adventures in Cooking - Macarons

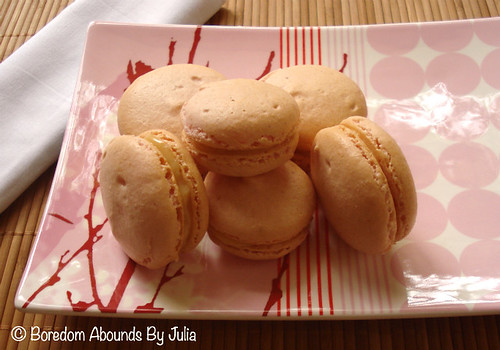
I have been wanting to try baking macarons for aaaages, mostly because of all the ones I've tried from shops have been nice, but too sweet to enjoy completely. So I found this recipe on Taste and decided it seemed simple enough to try myself. I didn't photograph the process because I wasn't sure they would work, so I didn't want to photograph all of it only to not be able to post them in case the macarons ended up in the bin.

Anyway, I tried them and they worked! It's a miracle!


I was nervous because I've never really baked anything that involved vigorous egg white beating, but I took my time, followed the recipe and everything went smoothly!

They're not as pink as I would have liked, mostly because I didn't want to overdose the mixture with pink food colouring so I erred on the side of less is more, and the filling, though nice, felt like it could be a lot lighter (the white chocolate and cream is quite dense, although not too overwhelmingly sweet). I think the secret to getting macarons right is beating the egg whites until they really do form stiff peaks, and piping them onto the tray properly. Although I couldn't seem to get some of them not to have the little kick of the piping bag on top of them.

I also think I probably should have baked them on a lower temperature for about another five minutes, because they are crispy on the outside and soft on the inside as they should be, but they collapse a bit too easily once you bite into them (or hold them too firmly), but other than that they're really nice. Not too sweet, not too almond-y (I hate really, really almond-y flavoured things.

I'm quite pleased with my efforts!

I'd like to try using hazelnut meal next time and do a choc hazelnut macaron and photograph the process, so we'll see if I have time to do that before the bub arrives.

Pin It

Wednesday, January 18, 2012

Adventures in Cooking - Choc Chip Cookie Bars

A few weeks ago we went to a little cafe up in the hills for a lovely brunch. Afterwards, we bought a couple of sweet things to bring home to have later. My choice was a choc chip and walnut cookie bar, that apparently was made with Lindt chocolate. Sounds delicious, right? Wrong. It was the driest, most tasteless thing I've ever eaten in my life. My people, choc chip anything should not be dry and tasteless. EVER.

I started thinking I could make my own version. So I did.

Behold:

Choc Chip Cookie Bars!

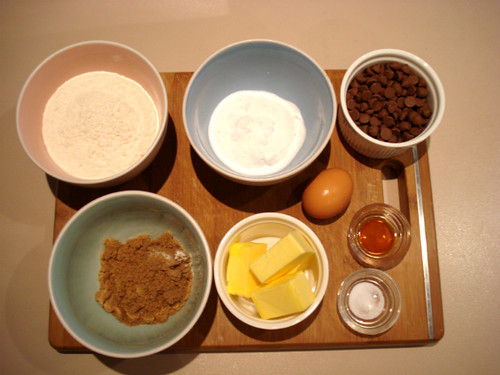
Ingredients
125 grams butter (room temperature)
1/2 cup caster sugar
1/2 cup brown sugar, lightly packed
1/2 teaspoon vanilla essence
1 egg
1 3/4 cups self-raising flour
1/2 teaspoon salt
125 grams good quality chocolate chips
50 grams chopped walnuts or hazelnuts (optional)

Total prep and cooking time: about an hour.
Pin It

Wednesday, November 9, 2011

Adventures in Cooking - Jam Hearts

I saw these a while ago on Taste.com.au and wanted to try them, but I knew they would be fiddly, so I waited until I had a free day on the long Melbourne Cup weekend to bake them. It was more time consuming than the usual things I bake (where I choose things based on how little effort it takes to make something yummy - let's be honest, laziness is a key motivator for me), but the end result was very cute.

Jam Hearts!


Ingredients
1 1/2 cups plain flour
3/4 cup almond meal
1/3 cup icing sugar
125 grams chilled butter, chopped
1 egg
1 tbs milk
150 grams milk chocolate
1 cup raspberry jam
2 tbs water
Large and small heart shaped cookie cutters.

Preparation and cooking time
On and off about two hours.
Makes about sixteen jam hearts.
Pin It

Wednesday, October 12, 2011

Adventures in Cooking - Mars Bar Slice

Mars Bar Slice is one of the quickest, cheapest and easiest slices to make. And it’s always a winner. ALWAYS. Now, for my non-Australian readers, a Mars Bar is the same as an American Milky Way Bar – just nougat and caramel covered in chocolate, no nuts. It’s delicious. So of course, what better way to eat it than mixed with rice bubbles and smeared in chocolate?

With that, I present to you a super-duper easy Mars Bar Slice recipe. Warning: one tray of this will last less than twelve hours, it's that delicious.


Ingredients
70 grams butter
1 tablespoon golden syrup
4 x 53 gram Mars Bars, chopped up
3 cups (60g) rice bubbles
250 grams good quality milk chocolate
30 grams additional butter (for icing)

Preparation Time
5 minutes
Cooking Time
About twenty minutes. Setting time is about two hours or so.

Pin It

Tuesday, September 27, 2011

Adventures in Cooking - Italian Lemon Biscuits

Remember this book from your mum's cookbook shelf? It was our staple sweet cookbook growing up, and the recipes are easy enough for kids over about twelve to do on their own. The chocolate chip cookies, chocolate coconut slice, the lemon coconut squares and the Lebkuchen from this book are things I've been baking for years and years. And they never fail to a) be totally delicious, b) super easy to make and c) a crowd pleaser. When I moved out of home, I found a copy on ebay for six dollars and out of all the cookbooks I own, it gets the most airplay.

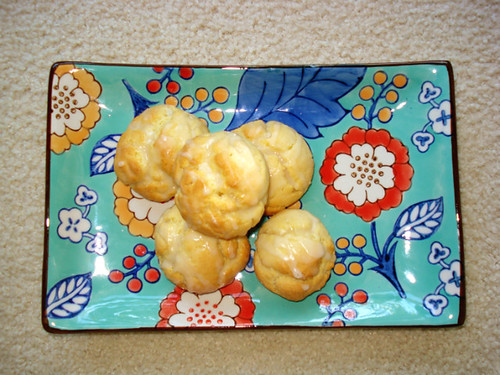
But today I wanted to try something different. I've had my eye on the Italian Lemon Biscuit recipe for a while now, and what do you know, we had another afternoon tea at work this week, so I spent a relaxing Sunday afternoon making a few batches of them for work and home.

I didn't take step-by-step photos this time, because it's a very easy recipe and also because I forgot to grab the camera and set everything up nicely. By the time I was wrist deep in mixture it was too late!

The gorgeous serving plate was bought from Bed, Bath and Table this past weekend (they also had it in a different colour - I want to say either a dusty red or white). I cannot go into that shop without buying some sort of home decor item. It was $14.95.

Ingredients
1 1/2 cups self raising flour
60 grams butter at room temperature (the original recipe called for LARD. Can you believe it?)
1 1/2 tablespoons of milk
1/3 cup of sugar
1/2 teaspoon vanilla essence
1 egg, lightly beaten

Method
1. Sift the flour into a bowl. With your fingers, rub and gently knead the butter into the flour until the mixture resembles breadcrumbs. My butter wasn't quite a room temperature, so I zapped it in the microwave for about fifteen seconds and it softened up nicely. Don't worry if it melts a bit, it will still rub in nicely. You just don't want the majority of the butter melted - it needs to be quite solid still.

2. Put the milk and sugar into a saucepan over a low heat. Stir constantly until the sugar is completely dissolved (this takes less than five minutes).

3. Add the vanilla essence to the milk and sugar mix and stir through. Turn off the stove and let the mix cool slightly.

4. Beat the egg and add it to the flour and butter.

5. Add the milk/sugar mix to the flour and butter. Stir through until the mixture becomes a soft dough. You may want to sprinkle a tiny bit more flour on the top of it if it still seems a bit wet.

6. Grab teaspoons full of the mixture and roll into ball shapes. I say ball shapes because I like mine to not be perfectly spherical. When they cook the tops sort of break up and open a bit, and I like the imperfect look. You can make them perfectly round if that's the sort of aesthetic you prefer when baking. 

7. Pop them on a baking sheet lined with greaseproof paper and bake in a moderate oven for about 10 to 15 minutes. In my fan forced oven I kept the temperature at about 140° celsius and baked them for about fifteen minutes.

8. Take the biscuits out when they just start to become golden on top and let them cool down.

Icing ingredients
2 - 3 cups of icing sugar
1 - 2 tablespoons fresh lemon juice
lemon rind (optional)

Method
1. Sift the icing sugar into a bowl. 

2. Pour in one tablespoon of lemon juice and stir it through. If it's too stiff, add more lemon juice a bit at a time. The icing should be runny, but not completely liquified.

3. Using a spoon, drizzle streams of icing back and forth over all the biscuits at once a few times until you have the amount of icing you want on each one.
4. Let the icing dry completely.

And that's it! It's so easy, and the biscuits really do have that Italian biscuit taste, but with a nice zing of lemon in the icing.

Notes
- I didn't use lemon rind on top of the icing because I think the icing is lemon-y enough. But it would look nice and add that extra bit of flavour.
- You could also add a tiny splash of lemon juice to the biscuit mixture as you add the egg and the milk/sugar to the flour and butter so that the lemon flavour carries through the biscuits.

Pin It

Wednesday, September 14, 2011

Adventures in Cooking - Brownies

We have an afternoon tea at work today, and I needed a blog entry, so I baked. It's a win/win! I've never made brownies before - wait, I should correct myself. I've never successfully made brownies before (they always end up flat, to cake-like or just weirdly cooked and I get totally enraged that I fail at something so simple and there is much banging of dishes in the kitchen as I clean up. See also: scones), so I thought I'd give them another try. I found this recipe on Taste and made a couple of modifications.


Ingredients
1 1/4 cups caster sugar
3/4 cup plain flour
1/3 cup cocoa
200 grams good quality milk chocolate (I used Cadbury Milk)
150 grams butter
3 eggs
250 grams white choc chips
Icing sugar, to dust

Pin It

Tuesday, July 19, 2011

Adventures in Cooking - Blondies

I had an incredibly busy and fun weekend - girlfriends came over for afternoon tea, we had lots of fun babysitting our one year old niece overnight for the first time (hello, 6am Sunday morning - I didn't know you existed), went to see the Building and Home Improvement show at the exhibition building and a family dinner Sunday night. Before my friends came over on Saturday for afternoon tea, I whipped up a batch of what is possibly the most delicious cake/slice treat ever. They're called Blondies, and they are the opposite of Brownies.

I first had these Blondies at a good friend's cellar tea in February. They were made by the bride-to-be's sister, and she very kindly emailed me the recipe during the week so I could add it to my recipe file. I've made them a couple of times since then and they never fail to impress  people - they're soft, moist and full of a delicious mix of flavours.

Unfortunately I didn't have time to photography the baking every step of the way like I usually do because I was pressed for time, but here is the result:


Prep time: 20 minutes
Cooking time: Varies, depending on your oven. Roughly 30 to 40 minutes

Ingredients
125g butter, chopped
300g good quality white eating chocolate
3/4 cup caster sugar
2 eggs, slightly beaten
3/4 cup plain flour
1/2 cup self raising flour
1/2 cup macadamia nuts, chopped coursely
150g raspberries
icing sugar for dusting

Method
1. Preheat oven to 170°C.

2. Grease 23cm sqaure cake pan/brownie tin.

3. Melt the butter and 200g of the chocolate over a saucepan of boiling water, stirring until it's melted and smooth. Remove from heat and let it cool for a couple of minutes until it's warm rather than boiling hot. The mixture will appear to separate as it cools, but this isn't an issue, so don't worry too much about it.

4. Combine sugar, eggs, sifted flours, additional 100g of white chocolate, raspberries and macadamia nuts in a bowl. Pour the melted butter/chocolate into the bowl and mix it all together until just comined. The raspberries will break apart as you mix it, but that's fine.

5. Spread mixture evenly into the greased cake tin and make sure the surface is fairly evenly flat all over. Bang the tin on the bench once or twice to remove any air bubbles.

6. Bake in moderate oven for about 30 to 40 minutes (or until firm and just cooked the whole way through). Set aside to cool completely.

7. Remove from cake tin and cut into sqaures or triangles. Dust with icing sugar before serving. The Blondies have a lovely sweet and tart flavour, thanks to the mix of white chocolate and raspberry, which is absolutely divine.

8. Store in an air tight container once cooled and cut up - the Blondies will keep for about four days or so.

Et Voila!

Notes
- As I have a fan forced oven that gets extremely hot very quickly, I cooked mine at about 140°C for about 45 minutes. Basically, I cooked it at a lower temperature for longer. I would probably lower the temp to about 130°C next time and cook it for about 50 minutes because the top and bottom cooked too quickly, while the middle took a while to bake properly.

- It's super important to melt chocolate in a saucepan over another saucepan of boiling water. The first time I made these I didn't, and while the butter melted fine, the chocolate got too hot and melted with quite a gritty texture. It was still usable, but it's really better to get it melted down as smoothly as possible. This applies to most reciped that call for melted chocolate.

- The macadamia nuts are optional and don't need to be included. I have left them out and the texture of the finished product is still great.

- This recipe is best served the day you make them as they're lovely and soft when they're first cut up, but serving them a day later is also fine as the density increases and they take on a subtle, fudgy texture which is also delicious.

- The mini milk bottle and the straw in my photo are both from The Little Big Company, a fabulous Australian party accessory supplier. I'm obsessed with nearly everything on their website. And they have an awesome blog with heaps of inspiration and style ideas!

Now I'm on the hunt for the perfect brownie recipe - I want something similar to Mrs Fields' double fudge brownies, but perhaps slightly less sickly sweet. They definitely have to have that lovely fugdy texture in the middle though - got any suggestions for me? Pin It

Monday, May 23, 2011

Adventures in Cooking - Makin' Whoopie.....

Whoopie Pie. Heard of it? Maybe, maybe not. It's an American thing, though from which part exactly I'm not sure (Amish? Deep South? I've read conflicting things). Anyway, the baking craze in Melbourne for the past year or so has been cupcakes, which I love. But I've seen Whoopie Pie cookbooks popping up in book shops and I've seen posters up in homeware stores for Whoopie Pies. Boredom Abounds' mother even saw some for sale in a cafe in Toorak about a month ago. 

So, I thought I better give these Whoopie Pies a try. I googled a few recipes and found this one. It seemed easy enough - and it was. Really, really easy. I did make a few alterations, so below you'll find the original recipe with my changes in brackets.

Ingredients
3 cups all purpose (plain) flour
2 teaspoons ground ginger
1 teaspoon ground cinnamon
1 teaspoon baking soda (bi-carb soda to us)
1/4 teaspoon ground nutmeg
1/4 teaspoon salt
3/4 cup butter, softened (6 ounces / 170 grams)
3/4 cup firmly packed brown sugar
1/2 cup molasses (I used treacle, which is basically the same thing)
1 egg
1 teaspoon vanilla essence
1/4 cup raw sugar
1 cup peppermint candies (which I didn't use - I hate peppermint. Blech)


Lemon filling 
(I didn't use the lemon filling part from the recipe at all because I couldn't find marshmallow spread. Instead I made a basic lemon rind icing)
125 grams cream cheese (room temperature)
50 grams unsalted butter (room temperature)
2 cups cups icing sugar
1 1/2 teaspoons buttermilk
1 - 2 teaspoons lemon rind
Pin It

Tuesday, March 15, 2011

Adventures in Cooking - Cinnamon and Applesauce Scrolls of Deliciousness

Monday was Little House on the Prairie Day at Chez Boredom Abounds. I made baked goods with yeast from scratch in the kitchen while my husband worked the land (well, he sucked up all the leaves in the driveway with his electric leaf sucker thingie and raked shit up out the back while listening to his iPod). So, it was kind of Little House on the Prairie in the twenty first century. Although we DO have an over-abundance of mosquitoes just like in the books when they eat all that watermelon from down near the river or something, but we haven't caught malaria yet. Yay!

Anyway. I have been wanting to make a bread-type thing from scratch for a while now, but I don't eat a lot of bread. So when I found a recipe for Cinnamon Scrolls, I thought "I can get on board with that." Sugar, cinnamon, apple sauce. Sounds delicious, and it doesn't even try to sound healthy, which I like when I'm baking. I was worried about cooking with yeast because I've never done that before and I'm not great at making scones, so I was worried about making dough and getting it to rise properly. But, if you read on, you'll see that my fears were unfounded!

Ingredients:
4 cups of plain flour
1/3 cup of caster sugar
2 x 7gram sachets of dry yeast (you can find this in the supermarket near the flour and bread mixes)
300ml milk, warmed slightly
100grams unsalted butter, melted
1 egg, lightly beaten
250gram jar of applesauce
1 teaspoon cinnamon
1 cup icing sugar
1/4 cup warm water
Extra cinnamon and sugar for dusting

Total prep and cooking time: about two to three hours (intermittent though - don't worry)
Pin It

Wednesday, December 22, 2010

Easy Peasy Christmas "baking"

I use the term "baking" loosely for this recipe, because there actually isn't any baking involved, which is great at Christmas time.

Anyway: RUMBALLS!

Christmas just isn't Christmas until you've stuffed yourself with delicious, delicious rumballs. They're a Christmas tradition in our family, and I made up a batch on Sunday to keep us going until December 25th (a day on which I'm already planning to wear something with as little elastic around the waist/stomach area as possible).

The great thing about rumballs is that if you are the kind of person who "can't" cook, you will definitely be able to master these. So, without further ado....


Ingredients
2 x 250 gram packets of Arnott's Marie biscuits (cookies to non-Australian readers - a very plain, sweet cookie)
2 x 395 gram tins of condensed milk
2 1/2 tablespoons of Bourneville cocoa
About three or four cups of desiccated coconut

Total prep and assembly time: about 45 minutes
Pin It

Wednesday, October 13, 2010

Heeeeeyyyyy PESTO!

Oh, hey, I started this post with a pun. That's not dorky at all......

So, obviously I made pesto. I bought a food processor a couple of weeks ago and thought pesto would be a simple thing to start with in my new appliance.

 It's a Kambrook, and I bought it for no other reason than it was under $100 in the recent Harris Scarfe sale. Man, that place has good sales. Sometimes I walk in there and I just want to buy stuff, just...whatever, simply because it's on sale.

Anyway, I went on to Taste.com.au to check out some pesto recipes and used this one as my basis, but I did add/change a few things.

Ingredients:
1 1/2 cups of fresh basil
1/4 cup of pine nuts
2 fresh garlic cloves
1/2 cup olive oil
1/3 cup grated parmesan cheese
A small handful of rocket
A small handful of cashew nuts

Total prep and cooking time: about 20 minutes.
Pin It

Saturday, July 17, 2010

Adventures in Cooking: Pear Gingerbread


I made this a few weeks ago and it was delicious. AND it was super easy. It's nice to serve to company or just to have in the cupboard to nibble.

Ingredients:
1/4 cup golden syrup
1/2 cup brown sugar 
100 grams butter
3/4 cup self raising flour
1/2 teaspoon salt
3/4 tablespoon ground ginger
1 teaspoon ground cinnamon
1 teaspoon ground nutmeg
1/4 teaspoon ground cloves
2 eggs, lightly beaten
1 large ripe pear

Total prep and cooking time: about 1 hour

Pin It

Wednesday, June 2, 2010

Adventures in Cooking - Easy spicy apple muffins

It's Winter, and I'm trying to fight the flab, so I was browsing some cooking websites last week looking for some healthy snacks to make. I came across a recipe that originated on the Reader's Digest wesbite and it sounded like it was right up my alley: spicy? Yum. Apple? My favourite flavour. Muffins?Mmmm...carby goodness.
So, on Sunday night I baked some. It was super easy. Check it:

Ingredients!
1 3/4 cups plain flour
1 cup soft brown sugar
2 sachets (about 40 grams each) apple flavoured instant porridge
2 tbsp olive oil spread (or margarine)
1 tsp bi-carb soda
1 tsp mixed spice
1 jar (250 grams) unsweetened apple sauce
2 tbsp canola oil
2 medium eggs
1 medium green apple

The good thing about this recipe is that it's dairy free - the apple sauce reduces the fatty content that would be there if you used butter, and there's also no milk, so that keeps the dairy-free peeps happy. You can also use wholemeal flour to be super healthy.


Total prep and cooking time: 30 - 40 minutes


Pin It